End Table Transformation

image

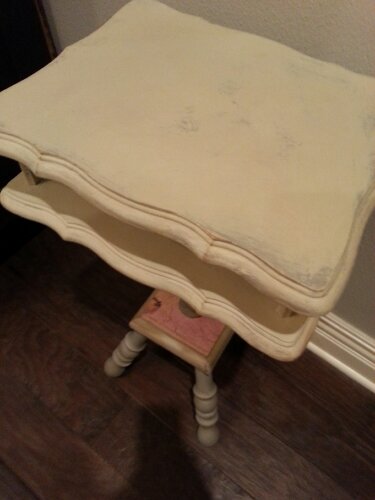
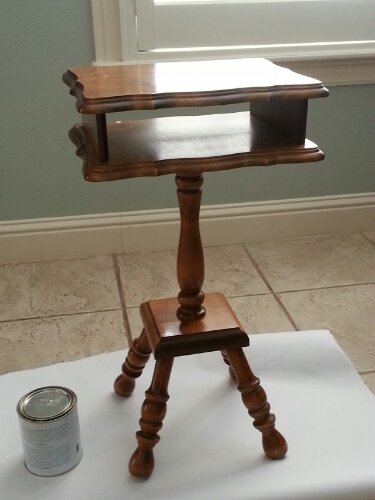
I love this cute little end table that I came across but not loving the out of date wood finish.   With a few supplies:

1.  Annie Sloan Country Grey

2.  Annie Sloan French Linen

3.  Annie Sloan Clear and Dark Wax

4.  Mod Podge

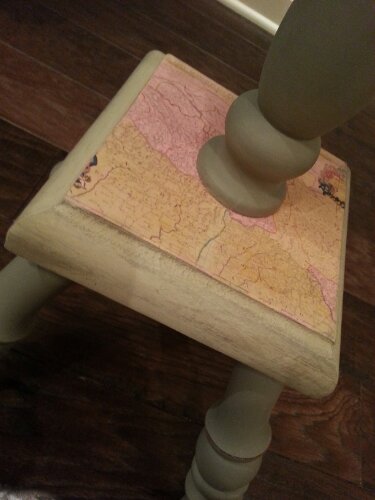
5.  Great French map via the Graphics Fairy

I was able to transform the table.


image

image

I found this amazing map of France via The Graphics Fairy, http://www.thegraphicsfairy.com and decided to add it to this table.  I love the hint of color it gave to the table.  The map adds so much character to this piece and is an unexpected detail.  Can you say tres chic?

Plain Cabinets Updated With Architectural Details

292

Need an easy and relatively inexpensive way to update your plain builders grade cabinets, architectural details and paint can add a distinctive touch to those plain cabinets.  Adding these simple wooden architectural details from Lowes to what was a standard builders grade cabinet before painting them gave these kitchen cabinets the added detail that they needed.

297

On the architectural elements I used Annie Sloan’s Provence and Paris Grey to highlight all of the details before painting the cabinets with a few coats of Old White paint and Annie Sloan’s aging wax.

471

577

547

605

625

Our kitchen originally had thin black granite countertops.  We changed those out as well, opting for a thicker lighter finish granite top.  On the kitchen island we chose a wooden top to break up all of the granite.  The lighter finishes really brightened up the kitchen making it seem larger.

355

Barkley kept photo bombing my pictures.  What can I say he’s a photo hound, and yes he can get into the sink and “help” with the dishes.554

The Painted Seat

As you all know, I have a slight obsession with chalk paint and I am sure for those that have used chalk paint you understand why.  It really is amazing at transforming that slightly out of date piece into something extraordinary.

This week I decided to try painting fabric with chalk paint.  I have read a few blogs where they had used it to paint fabric and this week when I went to my local Annie Sloan dealer and saw a chair they had painted I decided to go ahead and try it.  My small desk chair was the perfect candidate for my experiment.  The seat had a few stains and I have wanted to reupholster it for awhile, just haven’t wanted to spend the money.

wpid-20130610_160145.jpg

I am pretty sure when my husband walked in and saw me painting my desk chair, fabric and all, he officially thought that I had lost it.  But in my defense, I felt like there was nothing to loose.  So with my paint brush in hand and a combo of Paris Grey and French Linen Annie Sloan Chalk Paint I painted away. I will admit the existing fabric was hard to paint because of its texture and thickness.  A smoother fabric would have been much easier.   When painting the fabric I wetted the fabric first with a spray bottle and used 1/2 water 1/2 French Linen paint.  It took about three coats of paint to cover it well.  Once the paint dried I sanded the painted fabric, which got rid of the paint feel and made it once again feel like fabric.

wpid-20130611_093436.jpgNot too shabby for my first try at this.  Because the paint was so watered down I didn’t use much paint either.  I used probably less then a quarter of a can of paint on this meaning this little makeover cost me less then $15.

Trays, The Functional Accessory

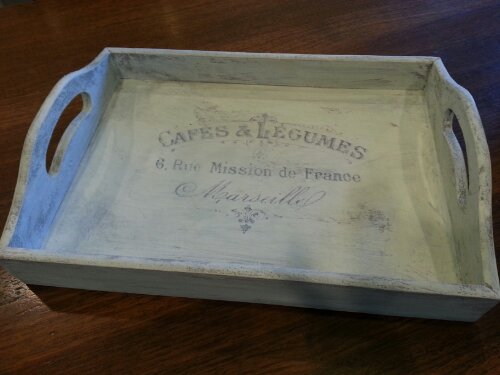
A tray can be one of the best accessories.  From the kitchen, living room, office, bathroom, and bedroom, the tray can work in any room of your home.  Not only are they decorative, they can serve a variety of functions, my personal favorite-breakfast in bed.

image

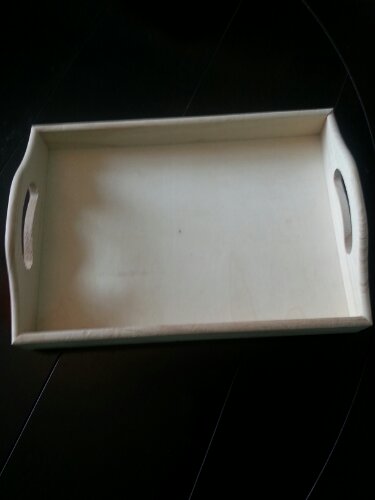
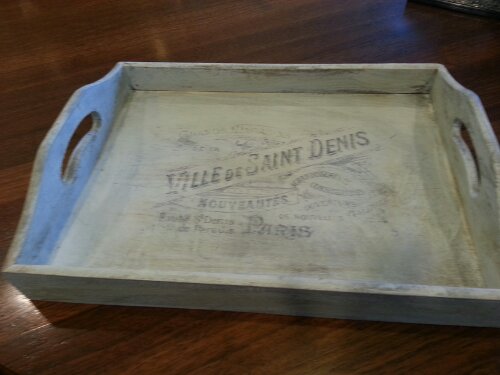
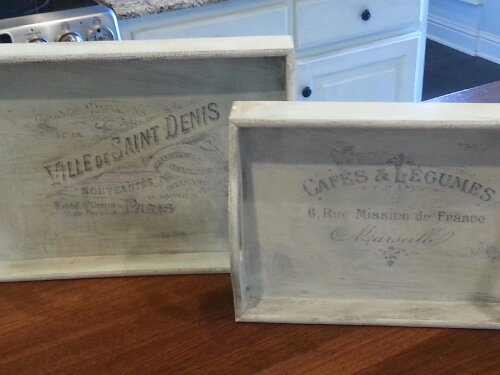
These plain wooden trays can be found at most craft stores.  There is nothing special to them at all but with a little bit of paint, imagination, and some great french typography you can transform them to fit your décor.

image

image

On these trays I used Annie Sloan’s French Linen for the base and a light coat of Old White. The French typography courtesy of The Graphics Fairy http://www.graphicsfairy.blogspot.com, gives the trays a great finishing touch.  This time I printed the graphics onto wax paper for the transfer (make sure and print your graphic using a mirrored image). This method is great for creating a piece that looks old even if it is brand new. The hardest part to this is honestly getting everything lined up just right.  Take the time before hand to mark where you want your graphic to go so that it is lined up straight and centered.
image

Do you have a tray in your home?  If so, what do you use it for?

Happy decorating:)

A Change In Paint (repost)

Sorry for the repost, I accidently deleted this post.  Oops.

On a recent shopping excursion I found this cute little side table.  It was the cutest shape.  The only issue was the previous owner was apparently a little girl who enjoyed expressing herself with nail polish.  The table was covered in globs of hot pink nail polish.  I had to get it though.  I knew with a little tlc this little table would be fabulous.

The first thing I had to do was give it a good sanding to remove all of the globs of nail polish.

Little Table Sanded Down

Little Table Sanded Down

Once I sanded it down I painted the first coat of paint in Annie Sloan’s Provence.  I then used a thin layer of  Annie Sloan’s Paris Grey on the base of the table and Old White on the table top.  I wanted to make sure that the Provence would show through in large patches to make it look more worn.

Applying A Coat Of Provence

Applying A Coat Of Provence

Once the paint dried I applied a cute little French graphic that I found on The Graphics Fairy website www.graphicsfairy.blogspot.com.

Graphic from the Graphics Fairy

Graphic from the Graphics Fairy

Make sure to print any graphic that you will be transferring with a mirrored image otherwise it will appear backwards once applied.  The Graphics Fairy makes this easy,  most of her graphics are available with a mirrored image download.

Also I like to print off the picture on a regular piece of paper so that I can get it lined up on my furniture and mark lightly with a pencil where I want it to go.  I do this to make sure the image is centered and straight.

Once I had it marked I printed the mirrored image on some waxy paper that was left over from a transfer sticky paper that I did not like.  You could also use the waxy side of freezer paper or wax paper to do this technique.

I transferred the image from the waxy paper to the table using a popsicle stick to rub the image on.  Tip: give the ink time to dry before doing anything else otherwise it will smear. Once the ink dried I sanded the table again lightly and gave it a coat of Annie Sloan’s clear and dark wax.

Small Side Table With Paris Graphic

Small Side Table With Paris Graphic

Table Top

Table Top

I couldn’t be happier with the result.  I still get amazed with every transformation.   Trust me if I can do it you can too.  Please feel free to ask any questions.  Happy decorating.
Paint, Tables, and Stencils Oh My

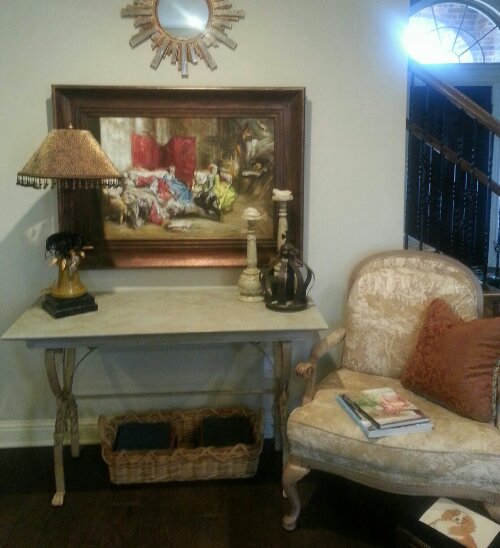
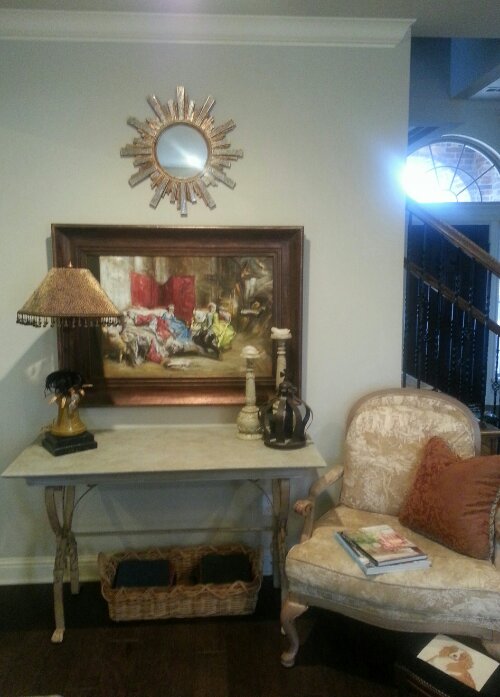
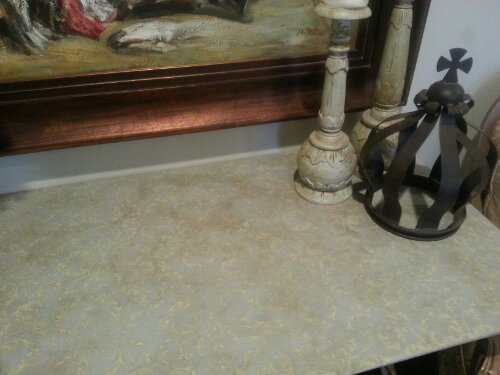
A few weeks ago I had promised to share the console table transformation I completed. This was easy-I only had to paint the top that had been scratched. The rod iron base already had a beautiful finish so I left it alone.
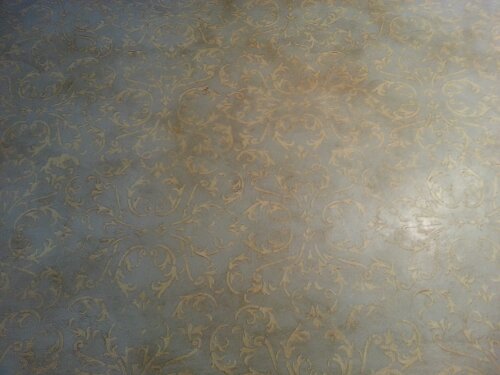
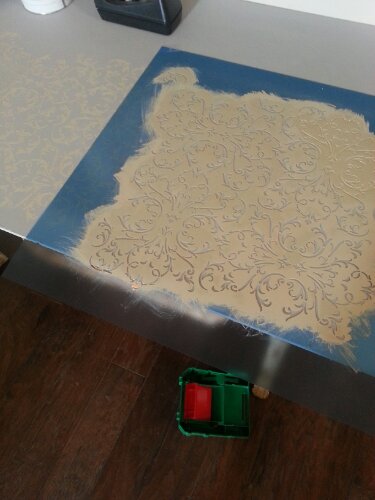
For this piece I painted on two coats of Paris Grey. Once it was dry I took a stencil and painted the stencil pattern onto the top using Country Grey to compliment the rod iron base.
image

The most important thing when using a repeated pattern like this is to make sure it is lined up straight. Also, I would normally start right in the center but the pattern was so intricate I knew that it wouldn’t make a big difference where I started, so I just picked a spot and began painting.

image

Above is a pic of the console top before the wax.

image

Once all of the paint was dry I used a coat of clear wax repeated by a coat of dark wax. It was a little dark so I took some clear wax to rub off the heavy dark wax in places. The clear wax will work like an eraser on the dark wax.

image

Another pic of the table completed and I couldn’t be happier with the results.

Making An Entrance Part 2

On the last blog I shared with you my entry table transformation.  Once it was completed I knew I had to address the mirror that I had hanging above it.  The mirror, with its oriental painting and black framing with gold accents was just too dark above the grey chest.  After a long debate of whether to replace the mirror with something new, I of course decided to just paint it.  I knew painting it was not enough though, it needed an extra something special.

After a pinterest spree extravaganza I discovered a website called The Graphics Fairy.  This site has a large array of free downloadable images for different craft projects. I was so inspired, I knew I had to think of a way to share this great site.  Light bulb.
Crown-Silhouette-GraphicsFairysm
This is just one of the many graphics you will find on the site. I  painted the mirror frame in the same paint that I had used on the table, I simply printed off this beautiful crown silhouette.

566_zpsf80c6e5f

After printing the image I took a light-colored pastel and colored the back of the paper.  Then I taped it  where I wanted the crown to appear and simply traced the drawing with a pen onto the frame.

line drawing

After removing the paper I was left with a nice tracing of the crown to paint.

567_zpse1007154

After painting on the crown I waxed the frame with Annie Sloan’s clear and dark wax.

582_zpsc7ca3608584_zps8be58406

I couldn’t be happier with my little experiment.  It was super easy and now my entrance is truly one of a kind.  I hope you check the site out, truly inspirational.  I have a link on my page.

If you have any questions please feel free to ask.  Thanks and happy decorating.
Making an Entrance part 1

One of the greatest discoveries that I have made over the year has been chalk paint (not to be confused with chalkboard paint).  I absolutely love it.  With this paint you can easily repaint a piece of furniture with little to no prep work.  I have used this paint on outdoor planters, tile, and furniture.  It sticks to anything.  One of the pieces that recently fell prey to my paint brush was my entry table.  It has a great shape and is the perfect size for my entryway.  The problem , it was a wood veneer and it had a couple of deep gouges in it that could not be fixed easily.

048_zpsf4fd8ab0

A close up of some of the damage  ( I have a four year old if that explains anything)

A close up of some of the damage ( I have a four year old if that explains anything)

When deciding how I wanted to repaint the chest, I knew I wanted it to be lighter and incorporate my favorite color grey.  I used Annie Sloan’s Paris Grey and Old White for the table and accented it in Martha Stewart’s metallic paint in golden pearl.

100_zpsf717a79e

Entry piece before wax

Entry piece before wax

Notice I even used the paint directly on the hardware.  Like I said it sticks to anything.

wax

After painting the table I used a combination of Annie Sloan’s clear and dark wax to give the piece dimension and character.  First, I applied the clear wax with a paint brush and wiped off the excess with cheese cloth.  I then completed the same process using the dark wax.  Always apply the clear wax first.  Also make sure to work in sections especially with the dark wax.

Entry piece after

It always amazes me what imagination and some elbow grease can make to a piece of furniture.

Design Inspiration in Arkansas

I guess since this is my first blog I should start by saying welcome. I am excited to share with all of you my love of interior design. My name is Laura. I have been in the design industry for over 14 years. I began my love of design watching The Christopher Lowell Show on The Discovery Channel (I am willing to admit that’s a little silly but I grew up in a small town). I decided to change my major from communications to interior design. In 2002 I received a Bachelor of Interior Design from the University of Arkansas. I went on to work as a designer in one of the best furniture and lighting showrooms in the state. Seriously, it is amazing. If you live close to northwest Arkansas, it is worth a trip. After having my son I took a few years to be at home with my kids. I have two children, a 15 year old (Audrey) and a 4 year old (Tripp). I am now working for myself as owner of Chateau Bleu, a decorating firm in Northwest Arkansas.

image

My husband Jim and me last Christmas.

image
A pic of my sweet kids

image

And a shot of my fur kids, Butters and Barkley.

Working in a furniture showroom for over seven years I have an appreciation for all styles of decor, buy my favorite would have to be a mix of french country and shabby chic. The curves of the cabriole legs, the stories told in the toile fabrics, and the beautiful mix of colors and patterns speak to me. It somehow fulfils my childhood fantasy of living in a chateau in the french countryside with my husband, the prince. Whether it is french toast or a beautiful Louis XV style chair, lets face it the french have amazing taste.

Along with my love of design I am a huge “do it yourselfer”. Yes I love the challenge but most importantly I love to save money. Let’s face it decorating a home can get expensive. You have to save money where you can. I love to think of creative affordable ideas that can make a big difference.

I am planning to use this blog to share my passion of design and teach others how to incorporate good design in their homes using basic design principles. I will also share some of my great do it yourself projects.

The following pics are from my latest furniture refinish. I will be sure to share the details of this project on the next blog.

image
image

Please feel free to leave comments.